The Magic Of Smart Mirrors Artificial Intelligence Augmented Reality Circuit Diagram User-Friendly: Ollama provides a straightforward setup for implementing AI tasks. Robust Performance: The speed and reliability of Ollama models allow quick responses, enhancing user experience. Integration with Smart Home Tech: You've got the potential to control your smart devices through the mirror using voice commands.
While your haircut, hair color, and makeup choices are important for your overall look, SenseMi expanded the makeover capabilities to create a virtual dressing mirror, too. The company's smart
How to Make a DIY Smart Mirror : 12 Steps (with Pictures ... Circuit Diagram
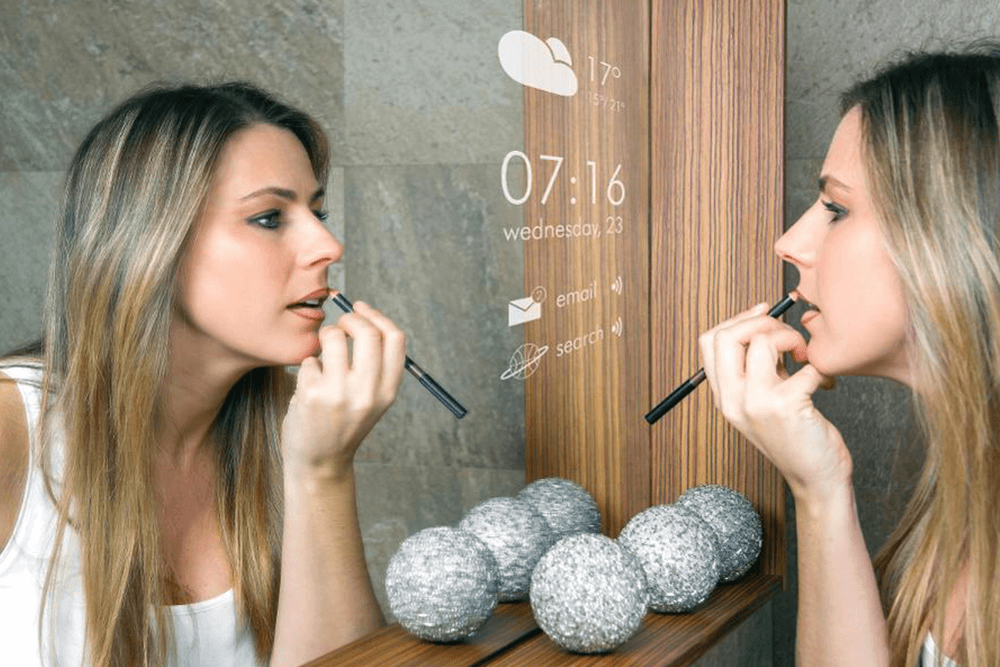
A smart mirror AI is an innovative device that combines the functionality of a traditional mirror with the power of artificial intelligence and smart home technology. It's a reflective surface We created another video recently that show you how to add artificial intelligence to the mirror. We created this AI and use Wit.ai for the natural language processing. Since the code is open source, anyone can help to make the AI smarter. Unfortunately, the AI is too much for a Raspberry Pi to handle, so we created a guide on how to set it up

Try out the Smart Mirror AI (Beta) face detection module. It's as simple as downloading the image and writing to your SD card for your Raspberry Pi 4. Smart Mirror AI Beta (1.0) includes: MagicMirror Build (Default) Face Recognition Module ; Face Recognition Model (OpenCV) Pre-requisites: This beta only supports Raspberry Pi 4. Imagine a Smart mirror that could work as a central touchscreen interface for your home to control smart home appliances, provide the latest news, stocks, and features Face recognition. Well, this is possible! In this article, you're going to find out how. This project is all about building a Smart Mirror AI (SMAI) powered by the MagicMirror

Raspberry Pi Smart Mirror : 4 Steps (with Pictures) Circuit Diagram
To power our Smart Mirror, we're using a Raspberry Pi computer. We recommend picking up the entire kit so you get all the various parts and pieces necessary, including a perfectly sized case. We start by inserting the memory card into the Pi and then placing it into the plastic case. We can then attach the power cable and the HDMI cable.
